
The Complete Guide to Merging Images Online: Spacing, Filters, Overlays, and Collage Tools That Actually Work
Introduction
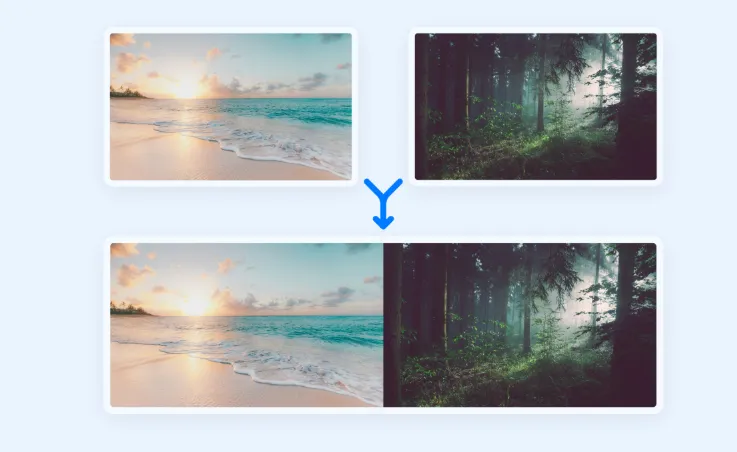
Whether you’re building a mood board, designing a social media post, or assembling a professional portfolio, the ability to merge images seamlessly — with full control over spacing, filters, and overlays — can make or break your final result. The challenge isn’t finding an image editing tool; it’s finding the right one that doesn’t require a design degree or a steep learning curve. Fortunately, the landscape of online image merging and collage tools has matured significantly, offering powerful features in browser-based platforms that anyone can use. This guide walks you through everything you need to know to combine images like a pro.
Why Image Merging Tools Matter More Than Ever
The demand for visual content has exploded across every digital channel — from Instagram carousels and email newsletters to e-commerce product pages and presentation decks. Static single images often don’t tell the full story, which is why the ability to combine multiple photos into a cohesive layout has become an essential skill for marketers, content creators, small business owners, and hobbyists alike.
Beyond aesthetics, image merging tools serve a practical function. They reduce the need for complex desktop software, save time when producing multiple content variations, and allow for real-time experimentation with spacing and visual effects. When a tool offers spacing controls, filter options, and overlay capabilities all in one place, the creative process becomes far more fluid and intentional.
The good news is that most of these tools are available entirely online — no downloads, no installations, and no expensive subscriptions required for basic use.
What to Look for in an Online Image Merge Tool
Before diving into specific tips and strategies, it helps to understand the core features that separate a great image merging tool from a mediocre one. Not all collage editors are created equal, and knowing what to prioritize will save you time in the long run.
Key features to evaluate:
- Spacing and padding controls — The ability to adjust the gap between images in a grid or freeform layout is essential for a polished, intentional look.
- Layer and overlay support — Tools that allow you to stack images, apply transparent overlays, or blend layers open up significant creative possibilities.
- Filter and adjustment panels — Built-in filters for brightness, contrast, saturation, and hue let you unify photos that were taken in different lighting conditions.
- Export quality options — High-resolution PNG or JPG exports ensure your merged images look sharp whether you’re publishing online or printing.
- Template libraries — Pre-built layouts speed up the workflow considerably, especially for standard formats like social media posts or product shots.
- Aspect ratio locking — Maintaining consistent proportions across merged images keeps your layouts looking professional rather than haphazard.
A tool that combines all of these features in a clean, intuitive interface is worth bookmarking and returning to regularly.
10+ Tips for Merging Images Like a Professional
1. Start With a Clear Layout Concept
Before opening any tool, decide whether you want a grid, a freeform collage, or a layered composite. Grid layouts are ideal for product comparisons or before-and-after presentations. Freeform collages work well for mood boards and creative storytelling. Layered composites — where one image is placed on top of another with transparency — are best for graphic design projects and promotional materials. Having a mental blueprint before you start saves time and leads to a more cohesive result.
2. Use Adobe Express to Combine Images Quickly and Professionally
One of the most capable browser-based options available today is Adobe’s dedicated feature for image combining. You can combine images directly within Adobe Express, which provides a streamlined interface for placing multiple photos into a unified layout. The platform includes access to templates, spacing controls, overlay effects, and one-click filters — all without requiring a full Creative Cloud subscription for basic use. It’s particularly well-suited for users who want professional-grade results without a steep learning curve, and the output quality is excellent for both digital and print applications.
3. Normalize Your Images Before Combining Them
One of the most overlooked steps in image merging is making sure all your source photos have similar color temperatures, exposure levels, and dimensions before you bring them into a collage tool. If one photo was taken in bright daylight and another indoors under warm lighting, the merged result will look disjointed even if the layout is perfect. Use a basic photo editor to normalize your images first — adjusting brightness and white balance so they feel like they belong together. This small step dramatically improves the professional quality of your final composite.
4. Leverage Spacing to Control Visual Rhythm
Spacing isn’t just a cosmetic choice — it communicates something to the viewer. Tight spacing (or no spacing at all) between images creates a sense of density and urgency, which works well for editorial or journalistic layouts. Wider spacing creates breathing room and a more premium feel, which is ideal for luxury products or clean portfolio presentations. Most online collage tools allow you to set spacing in pixels or as a percentage of the canvas. Experiment with both extremes before settling on something in the middle that serves your specific purpose.
5. Use Overlays Intentionally, Not Decoratively
Overlays — whether they’re solid color washes, gradient blends, or texture layers — are most effective when they serve a functional purpose rather than simply looking interesting. A dark overlay at the bottom of an image makes white text more readable. A warm color wash over a set of cool-toned photos can unify them into a single visual mood. A semi-transparent white overlay can soften an image without fully obscuring it. Before adding any overlay, ask yourself: what problem is this solving? If the answer is “none,” the overlay probably isn’t necessary.
6. Stick to a Consistent Filter Preset Across All Merged Images
When you’re combining multiple photos that were taken at different times or with different cameras, applying the same filter or adjustment preset to all of them is the fastest way to achieve visual consistency. Most online tools offer batch filter application or the ability to copy adjustments from one image to another. Prioritize adjustments that affect global tone — like desaturating slightly or boosting mid-range contrast — rather than heavy stylistic filters that can look dated quickly.
7. Work With PNG Files When Using Transparent Overlays
If your project involves any element with transparency — such as a logo, a graphic overlay, or a cutout image — make sure you’re working with PNG files rather than JPGs. JPGs don’t support transparency and will render a white or black background where transparency should be. Most online tools handle PNG layers correctly, but it’s worth checking the export settings to ensure transparency is preserved in the final output file as well.
8. Use Aspect Ratio Guides to Maintain Platform-Specific Requirements
Different platforms have different optimal image dimensions, and merging images without accounting for these requirements can result in awkward cropping or letterboxing after you upload. Before you begin, look up the recommended image dimensions for wherever your final image will be published. Instagram feed posts, LinkedIn banners, Pinterest pins, and website headers all have distinct aspect ratio requirements. Many online tools offer preset canvas sizes for popular platforms — use them as your starting point to avoid resizing headaches later.
9. Experiment With Blending Modes for Subtle Composite Effects
Blending modes determine how two overlapping layers interact with each other in terms of color and luminosity. The “Multiply” mode darkens the underlying layer, which is useful for adding shadows or grunge textures. “Screen” brightens, which is ideal for light flares or glowing effects. “Overlay” increases contrast while preserving the colors of both layers. Not every online tool offers full blending mode control, but those that do give you significantly more creative range when combining images into composites. If your chosen tool supports blending modes, spend a few minutes experimenting — the results can be striking.
10. Always Export at the Highest Available Resolution
It’s tempting to grab the first export that looks acceptable on screen, but always choose the highest resolution available in your tool’s export settings — even if you only plan to use the image digitally right now. Screen resolutions change, platforms evolve, and you may want to repurpose the image for print in the future. A high-resolution export gives you options; a low-resolution one limits them permanently. If your tool offers a choice between 72 DPI (screen resolution) and 300 DPI (print resolution), opt for 300 DPI as your master file and downsize from there as needed.
11. Group Similar Images Together Before Laying Them Out
When working with a large set of photos — say, a dozen or more — take a few minutes to group them by color temperature, subject matter, or visual weight before importing them into your collage tool. Grouping ensures that your final layout has an intuitive visual flow, with complementary images naturally adjacent to one another. This is especially important for grid-style collages where the eye travels from cell to cell in a predictable pattern. A little pre-organization pays off in a final result that feels purposeful rather than random.
12. Test Multiple Layout Configurations Before Committing
Most online tools allow you to rearrange images within a layout without losing your edits. Take advantage of this by testing at least two or three different arrangements before finalizing your design. Sometimes an image that seemed like it should anchor the center of a layout actually works better as a background element, and the photo you initially placed in the corner turns out to be the strongest visual focal point. Flexibility in the layout phase costs you very little time and can save you from publishing something that you’ll want to redo a week later.
Choosing the Right Tool for Your Project Type
Not every project calls for the same type of tool. Here’s a quick breakdown of which features matter most for common use cases:
Social media content: Prioritize platforms that offer pre-sized templates for each platform, built-in filter presets, and one-click export options. Speed and consistency are more important than granular control here.
E-commerce product photography: Look for tools with clean white-background options, precise spacing controls, and high-resolution export. Consistency across multiple product images is critical for professional storefronts.
Creative portfolios and mood boards: Freeform layout tools with strong overlay and blending mode support will serve you best here. The ability to layer images at variable opacities and apply selective filters makes for more expressive results.
Print materials (flyers, brochures, posters): Always use a tool that exports at 300 DPI or higher. Print tolerates much less visual imprecision than digital, so spacing accuracy and color fidelity matter most.
FAQ
Q1: What is the difference between a collage editor and an image merging tool?
The terms are often used interchangeably, but there’s a subtle distinction worth understanding. A collage editor typically arranges multiple images side by side within a structured or freeform grid, preserving each image as a distinct element. An image merging tool, on the other hand, may involve blending or compositing images so that they overlap, blend together, or share visual space as a unified whole. Many modern online platforms offer both capabilities in one interface, so in practical terms, the line between them has blurred considerably. The most capable tools today — including those built around layer-based editing — let you do everything from simple grid layouts to complex composites without switching platforms.
Q2: Are free online image merge tools good enough for professional use?
Many free online image tools are entirely sufficient for professional-quality output, provided you understand their limitations. The main constraints of free-tier tools tend to be export resolution caps, limited access to advanced features like blending modes or custom spacing, and the presence of watermarks on downloaded files. For most digital publishing purposes — social media, websites, email marketing — the output from a well-chosen free tool is more than adequate. If you need print-quality resolution, advanced compositing, or brand-consistent templates without watermarks, a paid tier or a dedicated creative platform will serve you better.
Q3: How do I maintain image quality when combining multiple photos online?
The key to maintaining quality when merging images online is to start with the highest-resolution source files you have and to export at the highest setting the tool allows. Avoid resizing images multiple times through different tools, as each resize operation introduces a small amount of quality loss. Stick to PNG for any images that include transparency, and use JPG only for final exports of photographic content where file size matters. It also helps to use tools that process images client-side or in the cloud at full resolution, rather than compressing everything to screen resolution at the point of upload. Checking the exported file size is a quick sanity check — if a supposedly high-resolution export is only a few hundred kilobytes, quality has likely been compressed.
Q4: Can I use overlays to protect my images from unauthorized use?
Overlays — particularly semi-transparent watermarks or text overlays — are one of the most common ways photographers and content creators protect their images from unauthorized use. Most online collage and image tools allow you to add a text layer or a transparent logo on top of your merged image before exporting. For more robust watermarking workflows, a tool like iLovePDF’s image tools can batch-apply watermarks across multiple images quickly. It’s worth noting, however, that watermarks are a deterrent rather than a foolproof protection — they can be cropped or digitally removed by determined bad actors. For images with significant commercial value, watermarking should be combined with other protections such as low-resolution previews and legal copyright registration.
Q5: What file format should I use when exporting a merged image with transparent overlays?
If your merged image includes any transparent areas — whether from a cutout, a glass-effect overlay, or an element that partially reveals the background — you must export in PNG format to preserve that transparency. JPG does not support an alpha channel (the technical term for transparency information), so any transparent areas will be filled with a solid color, usually white or black, when exported as JPG. PNG files are larger than JPGs, but the quality preservation is worth it for images where transparency is important. If your final image is fully opaque with no transparent areas, JPG at a high quality setting (85–95%) is perfectly appropriate and results in a much smaller file size, which is preferable for web publishing.
Conclusion
Merging images online no longer requires expensive desktop software or a background in graphic design. The range of browser-based tools available today — offering everything from basic grid layouts to sophisticated overlay and filter controls — puts professional-quality compositing within reach of anyone with an idea and an internet connection. The key is understanding what you need before you start: a clear layout concept, source images that are visually consistent, and a tool that matches the demands of your specific project.
By keeping the tips in this guide in mind — normalizing your images first, working intentionally with spacing and overlays, exporting at the highest possible resolution, and choosing a platform that fits your use case — you’ll consistently produce merged images that look purposeful, polished, and ready to publish. Whether you’re assembling a quick social post or building a portfolio piece, the right combination of tool and technique makes all the difference.